How To Compile A Home Energy Efficiency Audit Checklist
Many property owners are shocked to discover that their largest energy wasters aren’t what they expected. While old appliances are obvious culprits, inadequate insulation and duct leakage often cause much greater losses. A thorough home energy efficiency audit checklist provides a prioritized list of improvements based on potential savings and implementation costs.
Key Takeaways On A Home Energy Efficiency Audit Checklist
- A comprehensive home energy efficiency audit can reveal up to 30% in potential energy savings for most homes and businesses.
- The most effective energy audits examine five critical areas: HVAC systems, insulation/air sealing, lighting, water heating, and appliances.
- Room-by-room assessments provide more accurate insights than whole-building approaches for identifying specific energy waste points.
- Professional energy auditors use specialized tools like thermal imaging cameras to detect hidden issues that DIY audits might miss.
- EnergyWise Solutions provides detailed audit checklists that help both homeowners and businesses track and prioritize energy-saving opportunities.
Reducing energy consumption starts with knowing exactly where your house is wasting it. A proper home energy efficiency audit identifies these hidden drains on your wallet and provides a clear roadmap to lower utility bills. Without a systematic approach, most people overlook the biggest energy wasters hiding in plain sight.
Professional energy audits typically uncover 15-30% in potential energy savings for the average home or business. These assessments go far beyond simply checking for drafty windows. Using specialized equipment like infrared cameras and blower door tests, qualified auditors detect hidden issues that steal your money every month. The most valuable outcome of a professional audit isn’t just finding problems—it’s creating a strategic plan.
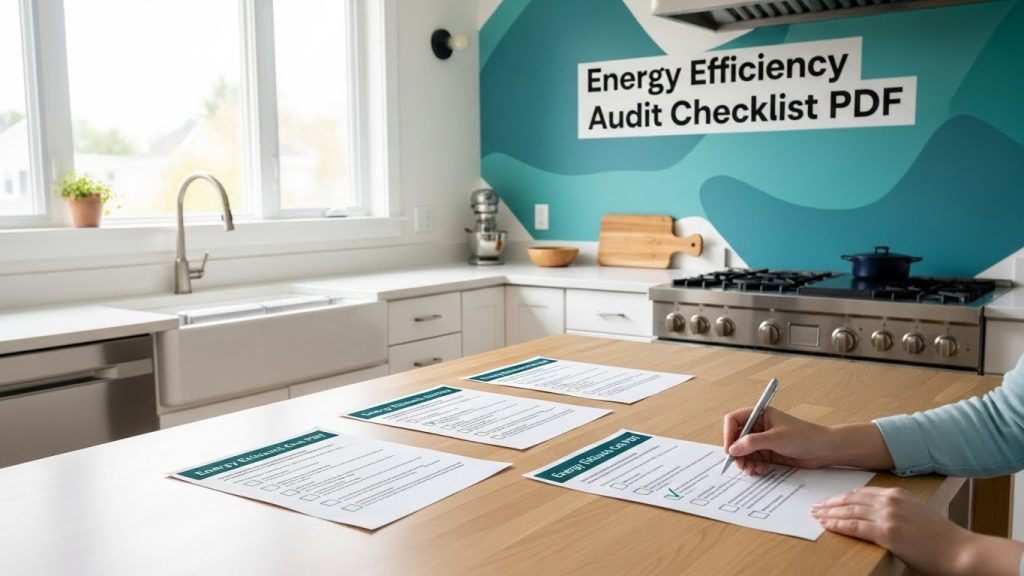
Complete Home Energy Efficiency Audit Checklist: What to Inspect
An effective energy audit examines every system that uses or affects energy consumption in your building. This comprehensive approach ensures no potential savings are overlooked. Your checklist should cover five major categories: HVAC, building envelope, lighting, water heating, and appliances/electronics.
Documentation is crucial for tracking findings and planning improvements. A well-designed checklist allows you to record measurements, observations, and recommendations in an organized format. Many professionals use digital forms that automatically calculate potential savings based on current utility rates.
HVAC System Evaluation Points
Your heating and cooling systems typically account for 40-50% of energy consumption. A thorough HVAC evaluation should examine equipment condition, maintenance history, ductwork integrity, and control systems. Start by recording the age, make, model, and energy ratings of all equipment.
Duct leakage is often a hidden energy thief. The Department of Energy estimates that typical homes lose 20-30% of conditioned air through leaky ductwork. Testing for and sealing these leaks can dramatically improve system efficiency. Don’t forget to check filter condition and replacement schedules, as dirty filters can increase energy consumption by 5-15%.
Smart thermostats and zoning controls offer significant savings opportunities. Your audit should document current temperature settings, programmable features, and opportunities for zoning improvements. Record temperature differentials between rooms, which may indicate balancing issues.
Insulation and Air Sealing Assessment
Poor insulation and air leaks can waste up to 20% of your heating and cooling energy. A proper assessment measures insulation R-values in all areas, including attics, walls, floors, and basements. Compare these values to recommended levels for your climate zone.
Air leakage points require special attention. Common culprits include window and door frames, electrical outlets, plumbing penetrations, recessed lighting, and attic hatches. Professional audits use blower door tests to quantify total air leakage and identify specific leak locations.
- Attic insulation: Check depth, type, and condition
- Wall insulation: Use thermal imaging to detect gaps
- Basement/crawlspace: Inspect rim joists and foundation walls
- Windows and doors: Test for drafts and seal condition
- Penetrations: Examine utility entries, vents, and fixtures
Lighting Efficiency Review
Lighting consumes about 15% of residential electricity and significantly more in commercial buildings. Your audit should inventory all light fixtures, noting lamp types, wattages, usage patterns, and control methods. LED replacements typically use 75-80% less energy than incandescent bulbs while lasting 15-25 times longer. For a comprehensive guide on conducting a lighting audit, you can refer to this home energy efficiency audit checklist.
Don’t overlook lighting controls as part of your assessment. Motion sensors, dimmers, timers, and daylight harvesting systems can reduce lighting energy use by 20-40%. Document areas where natural lighting could be better utilized and where automated controls would make sense. Many utility companies offer rebates for lighting upgrades, so note potential incentive opportunities.
Water Heating Systems Check
Water heating typically accounts for 14-18% of household energy bills. Your audit should record the age, type, capacity, and energy factor of water heaters. Look for insulation on both the heater and accessible hot water pipes. Measure hot water temperature at taps – settings above 120°F waste energy and create scalding hazards.
Distribution efficiency matters as much as heating efficiency. Long pipe runs, especially uninsulated ones, waste significant energy. Note the distance between water heaters and major usage points. Consider recirculation systems or point-of-use heaters for distant fixtures. Also examine flow rates at showerheads and faucets, as water-efficient fixtures reduce hot water demand.
Appliance and Electronics Energy Usage
Major appliances can account for 20% or more of home energy use. Document the age, make, model, and ENERGY STAR status of refrigerators, freezers, washers, dryers, dishwashers, and cooking equipment. Older models often use 2-3 times more energy than current efficient versions. Many utilities offer rebates for appliance upgrades, so note potential savings opportunities.
Don’t forget to assess “vampire” power from electronics and small appliances. These devices consume electricity even when turned off or in standby mode. A watt meter can measure actual consumption. Smart power strips, which automatically cut power to peripherals when main devices are off, offer simple solutions for entertainment centers and computer stations.
Room-by-Room Energy Inspection Guide
A methodical room-by-room approach ensures you don’t miss important energy-saving opportunities. Each area of your home or building has unique characteristics and common issues. This systematic inspection method helps identify problems that might be overlooked in a more general assessment. Record findings for each space separately to create a comprehensive picture of your property’s energy profile.
Use a floor plan to track your progress and mark problem areas visually. This mapping approach helps identify patterns that might indicate larger issues, such as insulation failures along an entire wall or duct leakage affecting multiple rooms. Take photos of problem areas to include with your documentation, as visual evidence helps when planning renovations or working with contractors.
1. Attic and Roof Inspection Items
Attics represent one of the most critical areas for energy efficiency. Heat rises, making ceiling and attic insulation your primary defense against winter heat loss. Check insulation depth, type, and coverage, noting any compressed or damaged areas. Measure the R-value and compare it to recommendations for your climate zone – most homes need R-38 to R-60 in attic spaces.
Proper attic ventilation balances home energy efficiency with moisture control. Examine soffit, ridge, and gable vents to ensure they’re unobstructed and properly sized. Look for signs of moisture problems like mold, mildew, or wet insulation. Check that attic hatches and pull-down stairs are weather-stripped and insulated. Finally, inspect ductwork running through unconditioned attic space for leaks and insulation condition.
2. Basement and Crawlspace Problem Areas
Basements and crawlspaces often contribute significantly to energy loss and comfort problems. Inspect rim joists where the house frame meets the foundation – this area frequently lacks proper insulation and air sealing. Check foundation walls for insulation coverage and condition. In conditioned basements, uninsulated concrete walls can create significant heat loss.
Moisture issues in these spaces affect both energy efficiency and indoor air quality. Look for signs of water infiltration, condensation, or high humidity. Examine exposed ductwork for leaks, especially at connections. Note the condition of any accessible plumbing, particularly hot water pipes that should be insulated. Finally, check for air leaks around penetrations where utilities enter the home.
3. Kitchen Energy Hogs
Kitchens concentrate energy-intensive appliances and often have multiple lighting systems. Start with the refrigerator, measuring its temperature (ideally 35-38°F) and checking door seals. Examine the dishwasher for leaks and cycle settings. Inspect range hoods to ensure they vent properly to the outside rather than recirculating air, which can increase cooling loads.
Lighting in kitchens is typically more intense than other areas. Document the types and wattages of all fixtures, including under-cabinet, task, and ambient lighting. Check for water leaks at faucets and look for opportunities to install aerators to reduce hot water use. Note counter-top appliances that may be energy inefficient or left plugged in continuously.
4. Living Spaces Energy Assessment
Living rooms, bedrooms, and other occupied spaces offer numerous energy-saving opportunities. Start with windows and doors, checking for drafts, proper sealing, and functional weatherstripping. Note window orientations and existing shading strategies that affect solar heat gain. Thermal imaging cameras can reveal hidden air leaks and insulation gaps in walls that aren’t visible to the naked eye.
Examine all electronics and entertainment equipment, as these areas often harbor energy vampires. Count the number of devices that remain plugged in continuously and identify candidates for smart power strips. Check thermostat settings and locations, noting if they’re affected by drafts, sunlight, or heat-producing appliances that could cause inaccurate readings.
DIY vs. Professional Energy Audits
Both DIY and professional energy audits offer valuable insights, but they differ significantly in scope and precision. Understanding these differences helps you choose the right approach for your needs. DIY assessments work well for identifying obvious issues and implementing simple fixes, while professional audits provide comprehensive analysis for more complex problems.
The equipment difference creates the largest gap between these approaches. Professional auditors use specialized tools like infrared cameras, blower door tests, and combustion analyzers that reveal hidden problems. These sophisticated diagnostics identify issues that visual inspections simply cannot detect, such as insulation voids inside walls or tiny air leaks in ductwork. For a comprehensive understanding of these tools, you can refer to this energy audit guide.
Cost considerations naturally influence this decision. DIY audits require minimal investment beyond basic tools like a thermometer, flashlight, and perhaps an inexpensive infrared thermometer. Professional audits typically cost $300-$800 for homes and more for commercial buildings. However, the value of a professional assessment often exceeds its cost through more comprehensive savings opportunities.
What You Can Find Yourself
DIY energy audits excel at identifying visible issues and obvious inefficiencies. With a good checklist, you can effectively locate drafty windows, missing weatherstripping, uninsulated pipes, and outdated lighting. You can also measure temperatures, check filter conditions, and inspect accessible insulation. These observations often lead to simple, cost-effective improvements that provide immediate savings.
When to Call in the Experts
Professional auditors become essential when dealing with complex building systems or hidden problems. They’re particularly valuable for diagnosing comfort issues with unclear causes, evaluating homes with high energy bills despite DIY improvements, and assessing older buildings with multiple potential issues. Professionals also provide crucial guidance for major renovations or HVAC replacements to ensure new systems address actual building needs.
Cost Comparison and ROI
The return on investment for energy audits depends on both the cost of the audit and the savings potential of the building. Professional audits typically identify 15-30% in potential energy savings, often translating to hundreds or thousands of dollars annually. Most homeowners recover the cost of a professional audit within 1-2 years through implemented energy-saving measures.
DIY audits offer essentially infinite ROI since their cost is minimal. However, they may miss substantial savings opportunities that professionals would catch. The most cost-effective approach for many property owners is to start with a DIY assessment, implement the obvious fixes, and then consider a professional audit if energy bills remain higher than expected.
Many utility companies and energy efficiency programs subsidize professional audits, sometimes reducing costs to $100 or less. These subsidized audits typically deliver the best overall value, combining professional expertise with minimal investment. Check with your local utility providers before scheduling an audit to identify available discounts.
Professional vs. DIY Audit Capabilities
Professional: Blower door testing, infrared thermography, duct leakage measurement, combustion safety testing, energy modeling software
DIY: Visual inspections, basic measurements, simple smoke tests for drafts, lightbulb and appliance inventoryThe most effective approach often combines both methods: start with a DIY assessment using a comprehensive checklist, implement the obvious improvements, then bring in a professional to address more complex issues. This staged approach maximizes your energy savings while minimizing upfront costs.
How to Document Your Findings within A PDF
Effective documentation transforms your energy audit from a one-time exercise into an actionable roadmap for improvements. A well-designed checklist helps organize findings systematically and creates a permanent record you can reference as you implement changes. The best documentation captures not just problems, but also their severity, potential solutions, and estimated costs.
Our comprehensive PDF checklist includes sections for all major building systems and provides space for both measurements and observations. You’ll find rating scales to prioritize issues, cost estimation guides, and recommendation templates that simplify the planning process. This structured approach ensures nothing falls through the cracks and helps track progress over time as improvements are made.
Using the Digital Checklist Effectively
Digital checklists offer advantages over paper forms, particularly for organizing and analyzing findings. Our PDF format allows you to enter data electronically, calculate potential savings automatically, and store information securely. You can easily share the document with contractors when soliciting estimates or with family members when discussing improvement priorities.
For maximum benefit, complete each section fully before moving to the next. Note both problems and positive features – understanding what’s working well can be just as valuable as identifying issues. Use the numerical rating systems consistently to ensure accurate prioritization. The digital format also allows you to update the document as improvements are made, creating a living record of your home energy efficiency audit journey.
Photo Documentation Tips
Visual evidence dramatically improves your audit documentation. Photos clarify issues that are difficult to describe in words and provide essential reference points when planning improvements. Our PDF includes space to link or embed photos directly within the relevant sections. For best results, capture images from multiple angles and include reference objects for scale when appropriate.
Thermal imaging, if available, adds another powerful dimension to your documentation. Even smartphone-compatible thermal cameras can reveal hidden issues like insulation gaps and air leaks. When taking thermal images, note the temperature differential between inside and outside – larger differences produce more revealing images. Always include standard photos alongside thermal ones for context and comparison.
Prioritizing Issues by Impact Level
Not every home energy efficiency audit and subsequent improvements deliver equal value. Our checklist includes a prioritization framework that helps identify which issues to address first based on four key factors: energy saving potential, implementation cost, comfort impact, and complexity. This systematic approach ensures you focus on changes that deliver the greatest return on investment.
The highest priority typically goes to issues that waste significant energy, have simple solutions, and affect comfort substantially. Air sealing and attic insulation often top this list, offering rapid payback and noticeable comfort improvements. Our rating system helps distinguish between these high-value opportunities and less critical issues that can wait for later implementation phases.
From Audit to Action: Next Steps
Translating audit findings into concrete actions requires a strategic approach. After identifying and prioritizing issues, the next step is developing a phased implementation plan that respects both budget constraints and logical sequencing. Some improvements naturally precede others – for example, air sealing should happen before adding insulation, and duct sealing before HVAC replacement.
Our action planning template divides improvements into immediate, short-term, and long-term categories. This framework helps distribute costs over time while capturing the most pressing energy waste issues quickly. The plan also identifies whether each task is suitable for DIY implementation or requires professional expertise, helping you budget appropriately for both materials and labor.
Quick Fixes Under $100
Many energy-saving improvements cost little yet deliver substantial returns. LED lightbulb replacements, programmable thermostats, weatherstripping, and pipe insulation typically pay for themselves within months. Our checklist highlights these low-hanging fruit opportunities, allowing you to achieve immediate savings while planning more substantial upgrades.
Other cost-effective improvements include installing smart power strips to eliminate phantom loads, adding door sweeps to reduce drafts, and applying window film to reduce solar heat gain in summer. These simple DIY projects require minimal tools and expertise but can collectively reduce energy bills by 5-15%. Our checklist includes specific product recommendations and installation tips for these quick wins.
Medium-Investment Improvements
The middle tier of energy improvements typically costs between $100-$1,000 and includes upgrades like ceiling fans, attic insulation, water heater insulation jackets, and ENERGY STAR appliance replacements. These projects generally deliver payback periods of 1-3 years while significantly enhancing comfort. Most can be completed as weekend DIY projects or with minimal professional assistance.
Air sealing represents one of the most cost-effective improvements in this category. Our checklist identifies common leakage points and recommends appropriate sealing methods for each. Properly applied caulk, foam, and weatherstripping can reduce heating and cooling costs by 10-20% while eliminating drafts and improving indoor air quality. The materials typically cost $200-$400 for an average home, with professional services running $500-$1,500.
Major Upgrades and Their Payback Periods
Significant energy improvements like HVAC replacement, comprehensive air sealing, wall insulation, and window upgrades require substantial investment but deliver long-term returns. Our checklist includes payback calculators that estimate return periods based on your local energy costs and specific conditions. Most major upgrades pay for themselves within 5-10 years while substantially increasing property value and comfort.
Energy Rebates and Incentives to Reduce Upgrade Costs
Financial incentives can dramatically improve the economics of a home energy efficiency audit and improvements. Federal tax credits, state rebate programs, utility incentives, and specialized financing options often reduce costs by 30% or more. Our checklist includes a comprehensive incentive section to help identify opportunities relevant to your specific location and project types.
The landscape of available incentives changes frequently, with new programs emerging and others expiring each year. Our digital checklist includes links to current databases that provide up-to-date information on available incentives. These resources can be filtered by location, project type, and building characteristics to quickly identify relevant opportunities.
- Federal tax credits for home energy efficiency improvements
- State rebate programs for insulation, HVAC, and renewable energy
- Utility company incentives for appliances and lighting
- Local government programs for energy audits and weatherization
- Special financing options like on-bill payments and PACE programs
For maximum benefit, research available incentives before finalizing improvement plans. Some programs require pre-approval or certified contractors, while others have specific equipment efficiency requirements. Our checklist highlights these prerequisites to ensure you qualify for all applicable incentives.
Combining multiple incentive programs can sometimes cover 50% or more of project costs. For example, a high-efficiency heat pump might qualify for a federal tax credit, state rebate, and utility incentive simultaneously. Our documentation system helps track these stacked incentives and incorporate them into your return-on-investment calculations.
Federal Tax Credits Available
Federal energy efficiency tax credits offer significant savings on qualified improvements. The current Residential Energy Efficiency Tax Credit provides up to 30% of costs for high-efficiency HVAC systems, water heaters, insulation, roofing, windows, and doors. Our checklist details the specific efficiency requirements for each category and explains the documentation needed to claim these credits on your tax return.
State-Specific Energy Programs
Sample of State Energy Incentive Programs (2023)
California: Up to $3,000 for home energy efficiency upgrades through Energy Upgrade California
New York: NYSERDA offers up to 50% cost-sharing for comprehensive home performance improvements
Massachusetts: Mass Save provides no-cost energy assessments and 75-100% incentives for insulation
Texas: Various utility companies offer rebates of $250-$1,000 for HVAC upgrades
Florida: FPL provides rebates up to $1,900 for high-efficiency central AC systemsState energy programs vary widely in their structure and generosity. Some states like California, Massachusetts, and New York offer comprehensive incentives covering multiple improvement types, while others focus on specific technologies or limited rebates. Our checklist helps navigate these differences and identifies the most advantageous programs for your location.
Many state programs are administered through utilities or designated home energy efficiency organizations. The application processes and eligibility requirements differ substantially between states. Our documentation system includes guidance on navigating these varying requirements and tracking application status.
Several states offer income-qualified programs that provide enhanced benefits for lower-income households. These programs sometimes cover 100% of energy improvement costs for eligible residents. Our checklist identifies these specialized opportunities and explains qualification requirements to ensure no one misses potential benefits.
Utility Company Rebate Programs
Local utility companies often provide the most accessible home energy efficiency incentives. These programs typically offer rebates for ENERGY STAR appliances, lighting upgrades, smart thermostats, and HVAC equipment. Many utilities also subsidize energy audits, sometimes reducing costs to $50 or less.
Some utilities offer innovative financing options like on-bill repayment, which allows customers to pay for efficiency improvements through their monthly utility bills. This approach eliminates upfront costs while ensuring the monthly payment is offset by energy savings. Our documentation system helps compare these financing options with traditional approaches to identify the most advantageous strategy for your situation.
Frequently Asked Questions About A Home Energy Efficiency Audit
Energy audits raise many questions about process, tools, and expected outcomes. We’ve compiled answers to the most common inquiries to help you understand what to expect and how to maximize benefits. These responses reflect both industry standards and our extensive experience conducting thousands of professional energy assessments.
How long does a complete home energy audit take?
A thorough DIY energy audit typically requires 2-4 hours for an average home, depending on size and complexity. Professional energy audits generally take 3-5 hours, including diagnostic testing with specialized equipment. Large homes or those with multiple HVAC systems may require additional time. The documentation and analysis phase adds another 1-2 hours for DIY assessments and is typically included in the service for professional audits.
What tools do I need for a DIY energy audit?
Essential tools for a basic DIY audit include a flashlight, thermometer, notebook, camera, and our comprehensive checklist. More detailed assessments benefit from additional tools like an infrared thermometer ($25-50), outlet thermal leak detector ($30-40), humidity meter ($15-30), and plug-in electricity usage monitor ($20-40). While professional equipment like blower doors and thermal imaging cameras are expensive ($2,000-5,000), some libraries and utility companies offer these tools through lending programs.
How much energy can I typically save after implementing audit recommendations?
Most homes and businesses can reduce energy consumption by 15-30% by implementing the recommendations from a comprehensive audit. Actual savings vary based on the building’s current efficiency, local energy costs, and which improvements you implement. The most inefficient properties sometimes achieve savings exceeding 50%, while newer, more efficient buildings might see more modest reductions of 10-15%. Our checklist helps estimate potential savings for each recommended improvement to create realistic expectations.
Should I perform an energy audit in summer or winter?
Ideally, energy audits should be conducted during extreme weather conditions when temperature differences between inside and outside are greatest. These conditions make air leaks and insulation problems easier to detect, especially when using thermal imaging. Winter audits excel at finding heat loss issues, while summer assessments better identify cooling inefficiencies and solar gain problems.
If possible, conducting two assessments—one in heating season and one in cooling season—provides the most comprehensive picture of year-round energy performance. However, a single thorough audit using our detailed checklist will identify most significant issues regardless of season. If you must choose, prioritize the season that dominates your energy bills.
Can renters benefit from an energy audit checklist?
Absolutely! While renters have limitations on structural changes, they can implement numerous no-modification improvements that substantially reduce energy bills. Our checklist identifies renter-friendly opportunities like smart power strips, LED lighting, window film, draft stoppers, and efficient appliance operation. These changes typically reduce energy consumption by 10-20% without requiring landlord approval.
Renters can also use audit findings to negotiate with property owners for more substantial improvements. Our documentation format creates professional reports that demonstrate potential savings, making a compelling case for landlord investment in efficiency upgrades. Many property owners are receptive to cost-effective improvements that increase property value and tenant satisfaction while reducing utility costs.
- Use thermal curtains to improve window performance
- Apply removable weatherstripping to doors and windows
- Install smart thermostats (with landlord permission)
- Use area rugs on bare floors for improved comfort
- Optimize refrigerator and freezer temperature settings
Energy assessment findings also provide valuable information when apartment hunting. Knowing which questions to ask about insulation, heating systems, and historical utility costs helps identify efficient properties. Our checklist includes a shortened version specifically for evaluating rental units before signing a lease.
For the best results, approach energy improvement as a collaborative process with your landlord. Many efficiency upgrades benefit both parties through reduced operating costs, improved comfort, and enhanced property value. Our documentation system includes communication templates for presenting findings and recommendations to property owners in a professional, persuasive format.
Start your home energy efficiency audit journey today with professionals or DIY tools to identify savings opportunities and implement effective improvements.

Conducting a home energy efficiency audit can help homeowners identify areas where they can save on utility costs and reduce their carbon footprint. By following a structured approach, you can systematically evaluate your home’s energy consumption and implement effective measures for improvement.